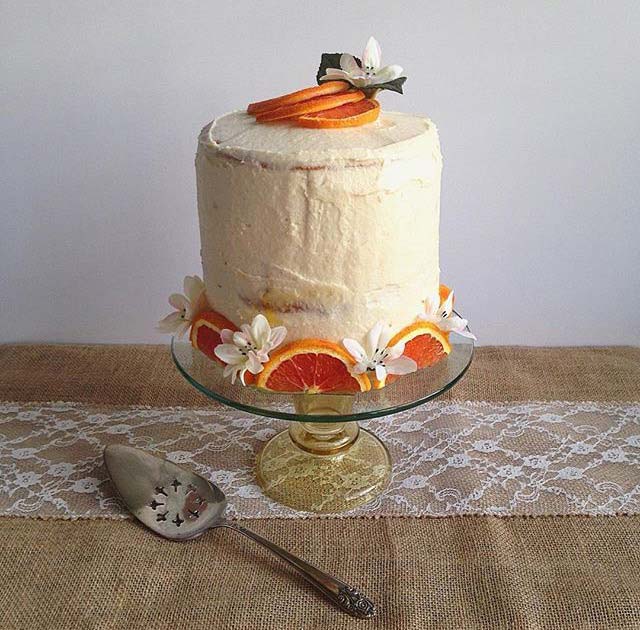
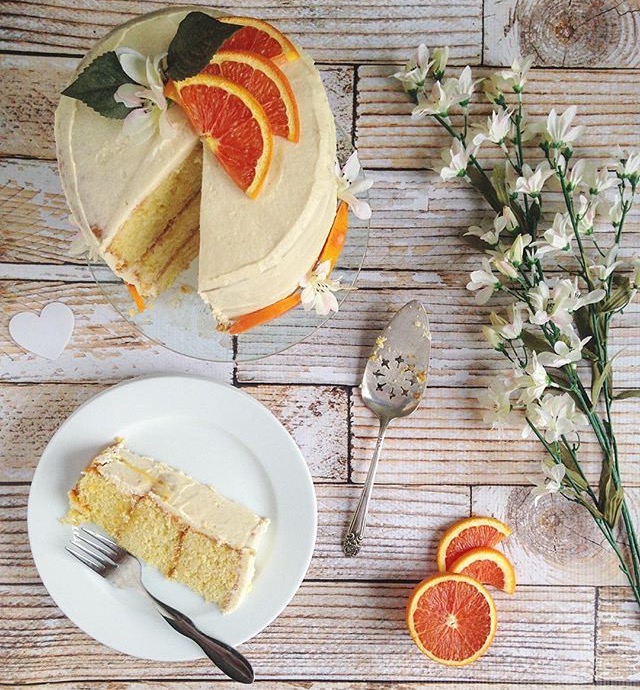
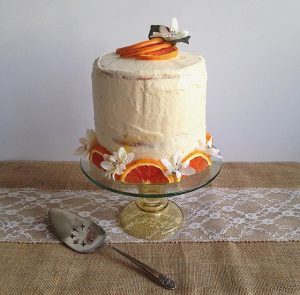
Cara cara orange cake with orange curd filling and honey cream cheese frosting! Citrus scented layers so light and airy combine beautifully with the filling and frosting. Don’t wait to celebrate a birthday with this beauty!
Cara Cara orange cake…you are my new best. But baking…you were never my best, until…
Growing up, I never really cared for baking because baking requires precision (math,) and patience. (I lit a batch of cookies on fire… don’t ask, I can’t even explain it.) If I wanted to do something for fun as a kid, baking definitely was not in “the cards”. Anyways, between being bad at math and the “cookie incident” I turned to cooking later in life. (Cooking has allowed me to be more “free” and less restricted… a pinch of this and a dash of that. Who needs math?!)
In the last couple of years I’ve really become more interested in baking. Maybe it’s maturity, or maybe it’s the desire to learn something new… either way, I’m hooked!
My determination to face my fears with baking and appreciating the “science” of baking has allowed me to branch out to other areas that I’m really excited to share with you, such as bread making…but that’s for another post.
This recipe includes the cake layers, filling and frosting. The process is more time-consuming than it is difficult so allow yourself plenty of time and bake at your own pace.
In the end, I’ve come to enjoy making the occasional layer cake, especially this Cara Cara Orange Cake and I hope you will too.
Orange Curd
- 2 Cara Cara oranges
- 1 tbsp. zest
- 1 stick unsalted butter at room temp
- 1-1/2 cups granulated sugar
- 5 egg yolks (reserve the whites in a glass dish for a later use)
- ½ cup Cara Cara orange juice freshly squeezed
- 1 tsp. Sweet & Salty Surrender
- Combine zest, sugar and Sweet & Salty Surrender together in a large mixing bowl.
- Using your fingers, mix to distribute the orange oils throughout the sugar.
- Add the butter.
- Using a hand mixer, whisk sugar and butter together until creamed. About 1 minute.
- With mixer on, add in 1 egg yolk at a time, creaming together until fully incorporated.
- Pour in orange juice slowly and continue to mix with hand mixer.
- Once combined, transfer to a medium saucepan.
- Turn heat to medium and cook mixture, stirring often until temperature reaches 170 degrees on a candy thermometer.
- Take off the heat and allow to cool.
- Once cooled, transfer to a glass jar and refrigerate for at least 2 hours (preferably overnight).
- Curd will become thick and spoon able.
- 1 stick unsalted butter at room temp
- 8 oz. cream cheese at room temp
- 1-1/2 tsp. pure vanilla extract
- 2 tbsp. honey (preferably orange blossom or wild flower)
- 1-1/2 tsp. Sweet & Salty Surrender
- 2 cups of powdered sugar
- In a large mixing bowl, combine butter, cream cheese, vanilla, honey and Sweet & Salty Surrender.
- Using a hand mixer, combine all of ingredients until fully incorporated.
- Add ½ cup of powdered sugar to contents at a time with hand mixer on.
- Continue to add powdered sugar until everything is mixed well.
- If the frosting appears too thin, continue to add ½ cup of powdered sugar until desired "frosting" consistency is achieved.
- If the frosting appears too dry, add ½ tbsp. milk until desired "frosting" consistency is achieved.
- 2-1/2 cups King Arthur unbleached cake flour
- 2 tsp. Sweet & Salty Surrender
- 1 tbsp. baking powder
- 1-1/2 cups granulated sugar
- 5 large eggs, separate yolk and whites (reserve the yolks)
- 1 tbsp. Cara Cara orange zest
- ½ cup Cara Cara oranges freshly squeezed
- ½ cup coconut oil
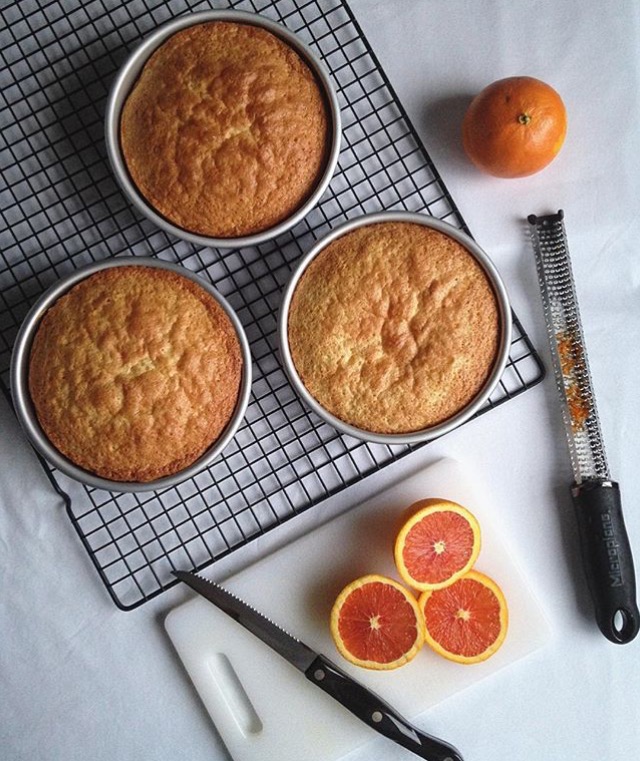
- *Feel free to use 2-8" cake tins or pans for a double layered cake. In this recipe I used 3-6" cake tins for a more dramatic effect.
- Preheat oven to 350 degrees.
- Spray cake tins with coconut cooking spray or coat with coconut oil and a paper towel.
- Dust flour on the inside of pans, tapping and moving flour around to coat entire pan.
- Over a medium mixing bowl, sift the flour through a sieve and discard any flour "pebbles".
- Add Sweet & Salty Surrender and baking powder, mix and set aside.
- In another medium bowl add the egg whites and whisk with a hand mixer until fluffy but not stiff. (If your eggs were cold, this shouldn't take more than a few minutes.)
- Set aside.
- In a large bowl combine the sugar and yolks, and mix with a hand mixer until creamed.
- Add in the zest and freshly squeezed juice and continue to blend with the hand mixer.
- Slowly combine the oil by drizzling in with hand mixer on and continue to mix until completely incorporated.
- Add in flour mixture in intervals, mixing with hand mixer.
- Fold in egg whites using a spatula. Make sure egg whites are incorporated but not vigorously mixed. The egg whites will help keep the cake layers light and fluffy.
- Pour the cake batter into each of the pans being sure to fill each pan as equally as possible.
- Tap pans onto countertop a few times to release any bubbles and to even out the batter in the pans.
- Bake for 20-25 minutes. The tops of your cakes should not be brown.
- Insert a toothpick to determine doneness. When removed, the toothpick should come out clean.
- Cool in pans on a wire rack.
- Once cooled remove cake from pans. Cutting around the edges with a knife may be necessary to remove the cake cleanly.
- If the cake has domed on the top, use a serrated knife to shave off that piece so that your layer is straight and even.
- At this point, your cakes are ready to be assembled.
- Using a spatula, fill a piping bag or plastic ziplock bag with frosting.
- Squeeze the frosting towards the tip of the bag (using a scissors, trim a slit at the tip of the ziplock bag.)
- Line the outer edges of your first layer cake with frosting. (This will keep the curd from spilling over the sides.) Genius tip.
- Dollop orange curd in the center and smooth evenly with a straight edge inside the frosting that was just piped.
- Place a layer of cake on top of the one filled with curd.
- Repeat the process.
- Place the last layer on top.
- Starting from the top of the cake, pipe a large amount of frosting in the center of the cake.
- Using a straight edge, smooth the frosting around the top and begin moving the frosting around the sides of the cake.
- Continue to add more frosting until the entire cake is coated.
- Use the straight edge to smooth and even out frosting.
- "Rustic," semi-naked cakes are the trend, so rest easy knowing your cake doesn't have to look perfect.
- Decorate with orange slices and flowers.
- STORING THE CAKE
- Place entire cake in refrigerator for about 30 minutes to allow frosting to harden somewhat.
- Cover with Press and Seal or cling wrap and put back in the fridge.
- Once ready to be served, remove from fridge, unwrap and let sit at room temp for at least 15 minutes before serving.
- When a cake has been cut into it will lose it's moisture more quickly. Be sure to wrap exposed cake before putting back into the fridge to retain its moisture.
- This cake was still moist and delicious up to 2 weeks in the fridge! I tested it to make sure. You're welcome.
If you happen to make this cake, take a photo of it and post it to Instagram and/or Facebook with the hashtag #sweetisthespice. And be sure to follow me on Instagram. (This is where I hang out.) My account name is…you guessed it! @sweetisthespice
I have been OBSESSED with Cara Cara oranges — they are so delicious and juicy and beautiful! This cake sounds perfect!! xoxo
Thank you! We share the same obsession! This cake is amazing and must be made again and again and again. 🙂